A Real-Deal Guide: How to Adjust Bike Brakes

Hey, fellow rider! I'm Tom, welcome to the small classroom of Euybike E-bike maintenance knowledge. Regarding bike maintenance, an essential skill every rider should have is adjusting their bike brakes. If you're looking to master the art of adjusting your bike brakes, you've come to the right place. In the Euybike blog, We're going to provide a step-by-step guide to help you adjust your bike brakes like a pro. You can keep your bike's brakes in tip-top shape by following a Euybike mechanic's approach. let's start!
Adjust the bike brake method: If the brake is loose, first adjust the screw on the brake lever. Turn counterclockwise, then turn the other nut clockwise. If the brake is still too loose, use a 5mm Allen key to loosen the screw on the top of the caliper and pull the brake cable an appropriate distance.
Prep Work:
Before we get into tuning the bike, let us tell you what tools and materials you'll need, and roughly how long it will take.
Tools: Grab yourself an Allen wrench.
Materials: Your bike and a well-lit area to work in.
Time: You'll be done in about 10-30 minutes.
Step-By-Step Guide
Assess the situation:
Start by taking a look at the gap between the handlebar and the brake lever when you squeeze it. You're aiming for a two-finger gap. If the brake lever's too close to the handlebar or the brakes are rubbing the rim, proceed with the following steps.

Minor tweaks:
First, try making minor adjustments with the barrel adjusters on the brake lever. If the lever feels too close to the handlebar, turn the barrel adjuster on the lever clockwise to tighten it. If the brake lever feels too loose, turn the barrel adjuster counterclockwise. This method can only adjust a little brake line distance. If this doesn't solve the issue, proceed to the next step.

Open up the brake:
If the barrel adjusters won't tighten the brakes, you'll need to adjust the brake cable. Use the Allen 5mm hex key to loosen the bolt that clamps the cable to the brake.

Pull the brake cable:
With the bolt loosened, yank the brake cable tight so the brake pads are resting on the rim. You should see the brake pads are very close to the hub but don't rub them, or you will have noise while riding.

Secure the brake cable:
While holding the brake cable tight, use your Allen wrench to re-tighten the bolt.

Finishing touches:
Now, tighten the barrel adjuster until the brake pads stop rubbing against the rim. That should give you the perfect tension for your brakes.

Test the brakes:
Twist the gas pedal and hold the brake lever to test the brakes. If it feels too tight or too loose, repeat the previous steps until there is no noise and the brake is stable.

Other situations:
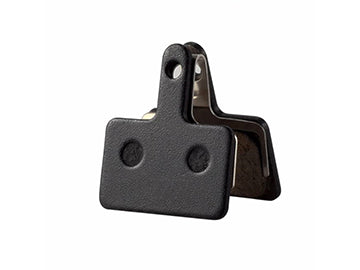
After adjustment, if the bicycle still cannot brake, then you should consider replacing the brake pads. Generally speaking, you need to replace the brake pads once a year, and if you cycle more often, you should replace them every six months. Timely replacement of brake pads is very important to your riding safety.
Note: This step for adjusting the brakes does not work on all bikes, only on regular disc mechanical brakes.
Finally. If you're not confident in your ability to do it yourself, or don't want the hassle, you can take your bike to a bike shop or bike mechanic who will usually charge you $20-$50.
In conclusion
Learning how to adjust E-bike brakes is an essential maintenance skill for a rider. With the right tools and our guide, it's easy to adjust your brakes. Remember, keeping your bike brakes in good condition not only gives you smooth braking, but also keeps you safe on your ride. RIDE NOW with EUYBIKE!
FAQ:
Q: How often do you tighten mechanical brake's pads on your e-bike to improve braking?
A: If you cycle everyday, we recommend doing this at least every two weeks. You should have your e-bike checked and adjusted regularly. It is recommended to take it to a reputable bike mechanic after an initial break-in period of 100 to 200 miles to make sure everything goes smoothly. Besides brake pads, you might also be wondering how often should you service your e-bike?
Q: Is it normal for e-bikes have slightly squeaky brakes?
A: Disc brake noise is due to any of several factors:
If the discs are sintered, made with metal as an ingredient, they will be noisy in many conditions. That's normal. If oil was placed on a brake pad and/or a rotor the brake will be noisy. Depending on how bad the situation is and how much pad is left, you can remove the pad and sandpaper it with a fine sandpaper. Clean the rotors with a clean solvent. Clean the pad with this solvent after using the sandpaper.
You can also view our instructional videos.






Leave a comment